Creating Zoom Effects for Images in Repeater in Wix Using Velo
- CD Studio .

- Nov 6, 2023
- 3 min read
Explore a step-by-step guide on how to implement captivating image zoom effects within a Wix website using Velo. Elevate your site's design with this easy-to-follow tutorial for a dynamic visual experience.
Zoom effect in Repeater

Prerequisite:
Before you start this tutorial, you need to create a Wix site and design a repeater
Step1:Enable CMS (Formerly Known as Content Manager)

To be able to add repeater , all the data must be in the CMS. For that, you need to enable CMS.
From the left side of the editor, select CMS Which is selected in the image.
Step 2: Create a Collection
After, adding CMS to the site, Add a collection (it's like a table in a database).

Select the CMS icon from the left window panel as you did in the last step, then click on Create Collection
Or, Click on Add Element > CMS > Create Collection

Name your collection, for example, I gave "images". Then click on Create.
Step 3: Add Fields to the Collection

Click on the "Title" Field > Edit to Edit your field name. I named it "Name" .
Adding Image field

You can Add images
Click on "Add field" (On the right side of the Title field) to Add other fields to the collection.
Now I am adding another field named 'image".
Here, the field type is kept as image.
Step 4: Add data to the collection

After adding the fields, you can add the contents you want here. (You can always edit content later)
Step 5: Insert Dataset to connect the repeater to CMS

In order to connect the elements on your page with the content in your CMS, you have to add a dataset to the page (it will be invisible in the published website).
Add element > CMS > Dataset
Step 6: Configuring Dataset

Once you inserted the dataset click on it and select the settings.

Then Select Your Collection,
here I selected images.
Step 7: Connect the repeater to the Dataset

After you configure the dataset, click on the repeater, and from the options click on "Connect to CMS"
Step 8: Connect Repeater Elements
Click on each element and connect it to the relevant fields.

Click on Image
Select the "Image source connects to" to the Image field

Likewise, connect other elements to the respective fields.
Now your Repeater should be populated with data from your CMS

Step 9: Turn On Developer Mode
To configure the buttons, we need to enable "Dev Mode" in order to write a few lines of simple code.

On the top left of the window hover over Dev mode.
Then click on Turn on Developer Mode
Step 10: Add Velo Package
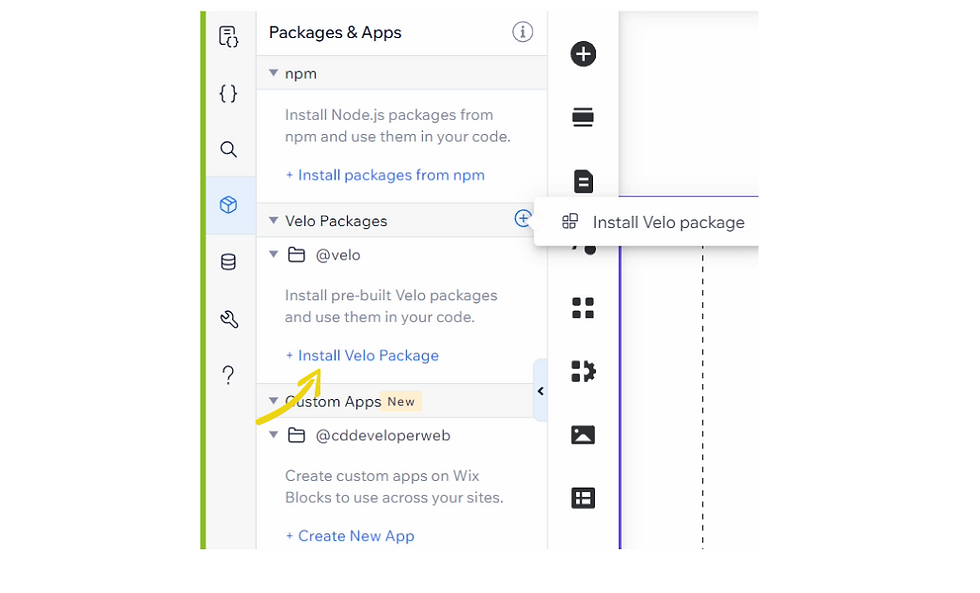
Install the Velo Package

Search for wix-animation-helpers, then click on the install button.
Now that we have successfully Installed wix-animation-helpers

Step 12:Code
On the left side of where you renamed the id, you can see the code panel. This is where we are going to write the code.

The code is as follows, copy paste from below to test it out:
import { zoom } from '@velo/wix-animation-helpers';

$w.onReady(function () {

    $w('#repeater1').onItemReady(($item, itemData, index) => {
        const images = $item("#image")
        const zoomTimeline = zoom(images, { duration: 600, pause: true });
        images.onMouseIn(() => zoomTimeline.play());
        images.onMouseOut(() => zoomTimeline.reverse());
    });

});
Step 13: Preview and Publish
On the top right side, click on "Preview" to see if your code is working. If it is working, then you can publish.
Output
onMouseIn will enlarge the image. When onMouseOut the image will be the same as before.

ZoomOut
ZoomIn
You can visit the example website here.


Comments