How Do I Add Sort to a Repeater in Wix 2023(code)
- CD Studio .

- Oct 6, 2023
- 4 min read
Updated: Nov 6, 2023
Adding a sort to your repeater on the Wix website can enhance user experience and make navigating and finding specific content easier for visitors. In this blog post, we'll walk you through the process of adding a drop-down sort to your Wix site, so you can organize your content effectively and provide a seamless browsing experience for your users.
Dropdown Sort in Repeater

Prerequisite:
Before you start this tutorial, you need to create a Wix site and design a repeater
Step 1: Enable CMS (Formerly Known as Content Manager)

To be able to add sort to a repeater , all the data must be in the CMS. For that, you need to enable CMS.
From the left side of the editor, select CMS Which is selected in the image.
Step 2: Create a Collection
After, adding CMS to the site, Add a collection (it's like a table in a database).

You can create a collection in two ways:
Select the CMS icon from the left window panel as you did in the last step, then click on Create Collection
Or, Click on Add Element > CMS > Create Collection

Name your collection, for example, I gave "sortingNames". Then click on Create.
Step 3: Add Fields to the Collection

Click on the "Title" Field > Edit to Edit your field name. I named it "name" .

Adding Image field
You can Add images
Click on "Add field" (On the right side of the Title field) to Add other fields to the collection.
Now I am adding another field named 'image".
Here, the field type is kept as image.
Step 4: Add data to the collection

After adding the fields, you can add the contents you want here. (You can always edit content later)
Here I intend to sort the repeater by image wise.
If you want you can add more fields to categorize.
Step 5: Insert Dataset to connect the repeater to CMS

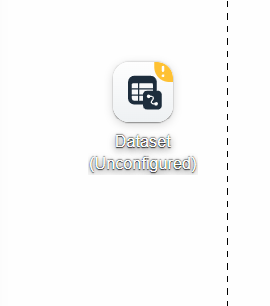
In order to connect the elements on your page with the content in your CMS, you have to add a dataset to the page (it will be invisible in the published website).
Add element > CMS > Dataset
Step 6: Configuring Dataset

Once you inserted the dataset click on it and select the settings.
Then Select Your Collection,

here I selected sortingNames.
Step 7: Connect the repeater to the Dataset

After you configure the dataset, click on the repeater, and from the options click on "Connect to CMS".

Choose the "sortingNames dataset" (Your dataset name) in the first drop-down.
Step 8: Connect Repeater Elements
After the last step, Below the dropdown, you can see the Elements section, Click on each element and connect it to the relevant fields.

Click on Image

Select the "Image source connects to" to the Image field

Likewise, connect other elements to the respective fields.
Now your Repeater should be populated with data from your CMS

Step 9: Turn On Developer Mode
To configure the buttons, we need to enable "Dev Mode" in order to write a few lines of simple code.

On the top left of the window hover over Dev mode.
Then click on Turn on Developer Mode
Step 10: Add Dropdown
Now that we have successfully set up the CMS and Repeater, the next step is to add a Dropdown to sort it.

Add Elements> Input> Dropdown
Step 11: Add choices to the dropdown (ascending descending)

Click on the dropdown > Manage Choices > Add Multiple choices

Now we have to enter the choices A-Z & Z-A, following the label (choices) we write its value after a comma
if you can't find an option add values, make sure you have turned on developer mode (step 9)
for A-Z, value is set as "asc" stands for ascending order.
for Z-A, value is set as "desc" stands for descending order.
value is provide for writing code
Step 13: Code
On the left side of where you renamed the id, you can see the code panel. This is where we are going to write the code.

The code is as follows, copy paste from below to test it out:
import wixData from 'wix-data'; $w.onReady(function () { $w('#sortDropdown').onChange(() => { let dropDownValue = $w("#sortDropdown").value; if (dropDownValue === "asc") { $w("#nameDataset").setSort(wixData.sort() .ascending("title") //title fieldkey (Name) ); } }) $w('#sortDropdown').onChange(() => { let dropDownValue = $w("#sortDropdown").value; if (dropDownValue === "desc") { $w("#nameDataset").setSort(wixData.sort() .descending("title") //title fieldkey (Name) ); } }) });
Step 14: Preview and Publish
Finally, check whether the dropdown is working or not by previewing the website. On the top right side, click on "Preview" to see if your code is working. If it is working, then you can publish.
Output


Comments